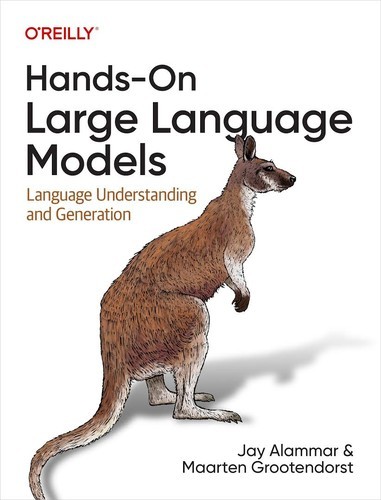
Hands-On Large Language Models: nearly 300 illustrations and a Colab notebook for every chapter, read in the order an FDE needs
This book teaches LLMs through drawings instead of formulas, and every chapter has a notebook that runs on a free GPU. For FDEs, the RAG chapter is the place to put in the effort first.
In brief
- Jay Alammar and Maarten Grootendorst's book has 12 chapters in 3 parts. It builds intuition and tells the story visually instead of leaning on formulas, with nearly 300 illustrations made specifically for the book.
- All the code is freely available on GitHub. Each chapter has a Colab notebook that runs on a free T4 GPU with 16GB of VRAM.
- For FDEs, chapter 8 on semantic search and RAG repays the most effort. The fine-tuning material in chapters 11–12 can wait.
- 1Part 1: ConceptsRead it all to build intuition and have illustrations ready when explaining to customers
- 2Chapter 8: Search and RAGRun the Colab notebook on your own documents and log every wrong answer
- 3Rest of Part 2Cover the full range of ways to use pretrained models
- 4Chapters 11–12: Fine-tuningDistinguish fine-tuning representation models for classification vs. generative models
Read the foundations first, focus on RAG in chapter 8, and leave fine-tuning until a customer actually needs it.
Graphic: FDE Times
Nearly 300 illustrations, every one made for the book. Maarten Grootendorst gave that figure when he announced the final version of Hands-On Large Language Models, which he wrote with Jay Alammar. The book’s official site lists a 2024 copyright.
For a technical book on large language models, that choice says a lot about what the authors were trying to do. They are betting that readers will understand LLMs faster through pictures than through equations.
For anyone aiming to work as an FDE, this way of teaching goes straight to the hard part of the job. The system has to work at the customer’s site, but you also have to explain why it gave a wrong answer to an operations manager who has never heard of an embedding. A book that teaches through pictures hands you ready-made ways to explain exactly that.
Intuition and drawings instead of formulas
Grootendorst describes the book’s approach as starting from intuition and telling the story visually, rather than relying on formulas. Andrew Ng, in his endorsement on the book’s site, says the authors keep up their tradition of explaining complex topics with beautiful, insightful illustrations.
Nils Reimers of Cohere calls it an excellent guide to language models and how they are applied in industry. Leland McInnes praises it for providing the clarity and hands-on examples needed to see through the AI hype.
This is not a picture book, though. All the code is freely available on GitHub, in a repo nicknamed “The Illustrated LLM Book”, under the Apache-2.0 licence. Each chapter has a Colab notebook, and the authors recommend running them on Google Colab with a free T4 GPU and 16GB of VRAM, so a browser is all you need.
The habit most worth taking from the book is drawing. If you cannot yet sketch how data flows, from the question through the search step to the answer, you do not really understand the system you are deploying. The nearly 300 illustrations in the book are models to practise from.
Twelve chapters, but FDEs should read them in a different order
The book has 12 chapters in three parts: Concepts, Using Pre-Trained Language Models, and Training and Fine-Tuning. That order makes sense for someone learning from scratch. An FDE, however, should prioritise by the questions customers ask most often.
Read all of Concepts, because it underpins every conversation that follows. Then go straight to chapter 8, Semantic Search and Retrieval-Augmented Generation. This is the chapter closest to FDE work: getting a model to read a customer’s internal documents and answer correctly.
One wrong answer, traced back to its source
Picture a customer: an insurance company that wants its call-centre staff to look up a few hundred policy clauses quickly. An agent asks: “Does the policy pay out if the customer has a motorbike accident outside working hours?” The system answers, fluently, that it does.
Suppose that in fact the exclusion clause sits in section 15 and states clearly that there is no payout. The debugging trick is not to rush to swap the model. Print out the 3 passages the search step handed to the model.
If all 3 come from section 12, which covers working hours, and none from section 15, the model did nothing wrong. It answered correctly based on what it was given to read.
So the fault lies in retrieval. Perhaps section 15 was split mid-way during chunking, or the word “exclusion” was not semantically close enough to the question. This is practitioner advice, not something from the book: when you run the chapter 8 notebook, practise checking the search step on its own first, and only then look at the generation step.
Once you have finished chapter 8, go back to the remaining chapters of Part 2 to cover the full range of ways to use pre-trained models. Part 3 can wait.
Fine-tuning is the last chapter, and belongs at the bottom of the to-do list
Chapters 11 and 12 cover fine-tuning: one deals with representation models for classification, the other with generative models. Knowing how to separate the two helps you pick the right tool when a customer states a requirement.
Many customer requests, such as classifying complaint emails or labelling support tickets, are really classification problems. In those cases, fine-tuning a representation model may be enough, with no need to touch a generative model.
A small exercise to build this reflex: write down five hypothetical requests, such as “flag support tickets as urgent” or “draft replies to complaints”. For each one, ask a single question: is the output a label from a fixed list, or a new piece of text? If it is a label, think of a representation model first.
In real customer work, fine-tuning is usually worth considering only after prompting and retrieval have been tried thoroughly. Reading Part 3 is about knowing when it is worth doing, not about doing it in your first week.
Who should read it, and what to put on your CV
If you write Python but have never built an LLM system, the ready-to-run Colab notebooks are the gentlest way in. If you are already comfortable training models, you will probably move through Concepts fairly quickly, and the main value lies in the notebooks.
If you are targeting an FDE role, turn the chapter 8 notebook into a small project on real documents, for example documents in Vietnamese or another language you work in. Log every wrong answer and the step where the error originated.
On a CV, a line such as “built RAG on Vietnamese-language documents, found and fixed errors in the retrieval step” is far more convincing than a list of completed courses. When reading job descriptions, look for phrases such as semantic search, RAG or embedding, because those are what this book helps you practise.
For Hands-On Large Language Models, the sensible measure is not how many chapters you have read, but whether you can bring a RAG demo to an FDE interview and explain why it once gave the wrong answer.
Was this article useful?
Thanks for the feedback!